


Talking Point: Cable DIY

Is building your own cables worth it?
The short answer is yes, particularly if you’re very invested in the hobby and see yourself purchasing cables on a routine basis.
Positives of Cable DIY
- Complete freedom to build cables that synergise perfectly with your IEMs
- Significant potential cost savings compared to purchasing finished cables
- Different combinations of parts lets you tweak performance even more
- Pride of owning something you built with your own hands
- Broadening your knowledge & adding a new way to interact with fellow hobbyists
Negatives of Cable DIY
- Modest initial investment in the necessary equipment
- Time consumed by learning new skills, ordering parts & building cables
- Learning curve may lead to frustration in your first few attempts
- Another rabbithole to potentially swallow your income
There’s plenty of upsides to building cables, the downsides can mostly be measured in time & money.
My Own DIY Story
The best way to articulate my thoughts on the key question (is it worth it?) is by giving you my own story.
For over 10 years I’ve been an audio DIYer with fairly modest theoretical knowledge – mostly I enjoy tinkering with things, and love experimenting with swapping capacitors & resistors or making simple circuit changes to amplifiers to hear how performance improves.
DIY has greatly enhanced my audiophile journey (having been in the hobby nearly 30 years) but sadly there’s much less scope for DIY in the portable audio space because modifying earphones generally isn’t practical, and tinkering with Digital Audio Players containing very little free space inside can be difficult.
So cables are the obvious path for portable audio DIY, yet until earlier this year I’d never bothered making any. What dissuaded me was knowing they can be purchased so cheaply from brands like NiceHCK & Penon Audio, making me wonder if the time needed to learn how and the hassle of ordering all the parts was worth it. I was also concerned about durability, wondering if my solder joints would hold up to daily use.
It was only the idea of building a few cables to include in this shootout that prompted me to give it a go.
Why Building Cables Makes Sense

Having finally made the jump & built some impressive cables, I wish I’d started sooner for a few reasons.
Firstly there’s a learning curve to building IEM cables but it isn’t rocket science. Soldering is a skill, as is braiding wire, but they’re fairly easy to pick up. As for durability that’s largely solved by applying heatshrink which is quite easy.
Nor is finding the right parts difficult. Hakugei sell cable accessory kits that contain all the hardware needed to build an IEM cable, then you just buy 5 meters of bulk wire (enough for a 4 wire 1.2M cable) and you’re set. You can even buy pre-braided wire to make life easier.
For tools all you need is the following:
- A cheap Soldering Iron
- Some Solder
- Cheap Heatshrink Kit
- Gas Stove Lighter to shrink the heatshrink
- Heavy Book to hold your wire in place while you braid it
- Sharp Knife to strip the ends of the wire’s insulation
- Desktop Lamp so you can see what you’re doing
There’s a knack to different aspects of cable building I haven’t mastered yet, but building one that works is surprisingly easy. I do strongly suggest building a basic 4 wire cable using reasonably thin wire for your first attempt, as thicker & stiffer wire is much harder to work with, and the same goes for the number of wires – building an 8 wire cable with thick wire is not something I’d recommend without experience.
As for cost savings, the more expensive the cables you make the more you’ll potentially save. With entry-level cables the savings are minor, but as you get closer to flagship cable territory you can potentially save hundreds, maybe even thousands on a single cable.
However I see the biggest value of DIY being the freedom to experiment. Believe it or not, different 4.4mm plugs, 2pin connectors and even solder will all affect how your cable sounds. Buying new cables means you have no choice but to accept whatever combination brands present you with, however by DIYing you can mix & match to your heart’s content.
You can even experiment with funky combinations like an 8 wire cable containing two pure copper wires, two pure silver, two palladium-plated silver & two gold-plated copper… because why not!
Why Building Cables May Not Make Sense
Entry-level Chinese IEM cables are so affordable and perform to such a competent level these days that if you never plan on spending more than $100 on a cable it’s tough to justify the time & effort involved in building your own.
Make no mistake though, even if you only purchase budget cables you still stand to save more than you may realise making them, and soldering isn’t so difficult that the cables you make can’t sound just as good or better than those you buy. In fact you may be surprised how shoddy the soldering is on some cables and how easily you can improve upon it.
Financially DIY makes complete sense aside from the fact doing it may encourage you to build more cables than you planned, instead the real cost is in time and potential frustration.
First you’re going to need to buy the equipment and then the parts to build the cable itself, then you might want to watch a video on how to build an IEM cable (another video here) and if you’ve never soldered before it’s a good idea to experiment beforehand, which you can do by buying some ultra cheap wire & generic 3.5mm connectors and soldering a few together to practise.
There’s a knack to tinning wires & soldering them to connectors you may struggle with at first, and similarly braiding may not be as straightforward as you imagine if you’ve never tried it.
You wouldn’t be the first person to give up after a few frustrated attempts, so there’s always the danger you could invest in tools & materials only to end up without a cable. Which is why I advise purchasing only a cheap soldering iron, wire & connectors to get started.
Investing In Better Equipment
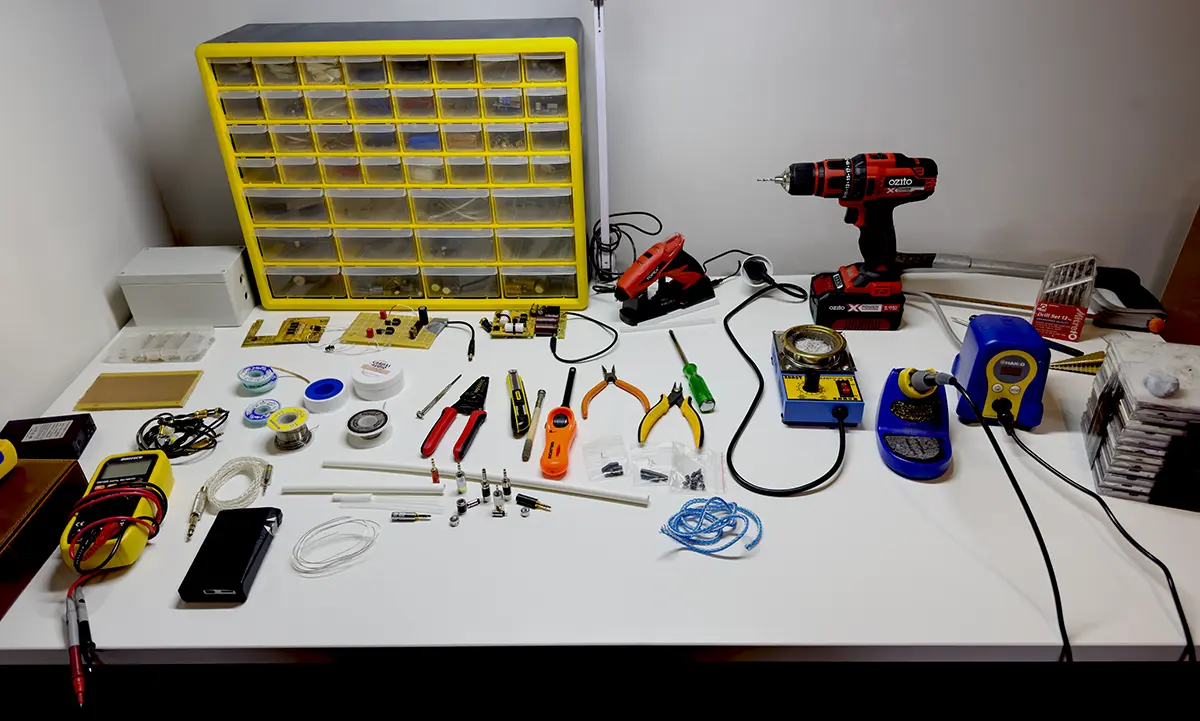
A cheap soldering iron is all you need to start, but there’s advantages to spending more on a better setup.
A cheap soldering iron will make soldering more difficult & less enjoyable, potentially make it harder to achieve high quality solder joints that conduct the signal effectively, particularly if you’re a beginner.
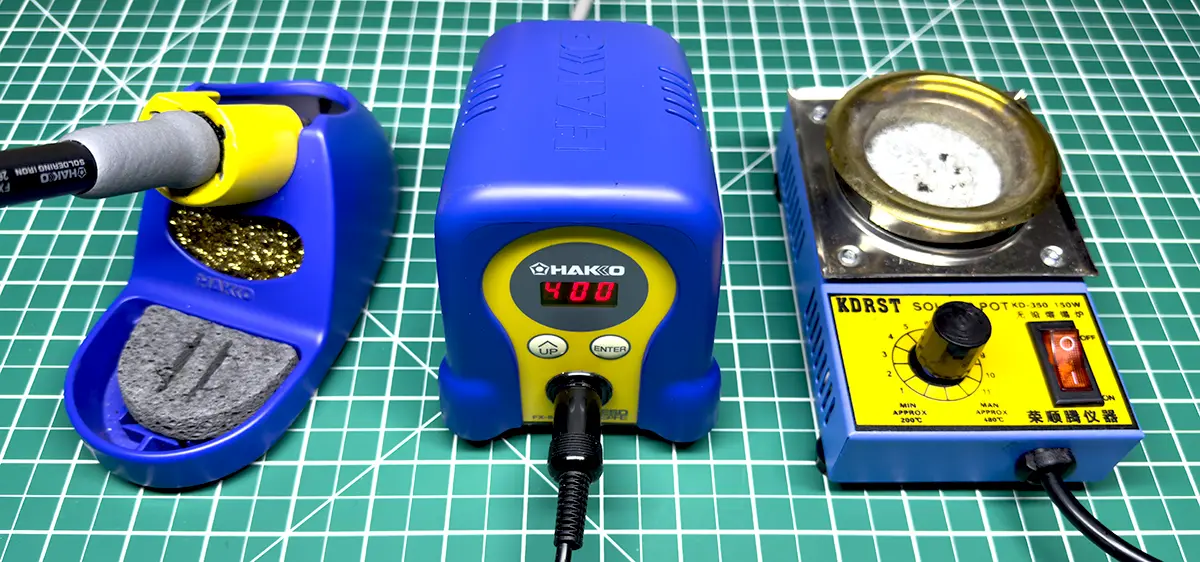
Having said that, for 10 years I used a very cheap Duratech soldering iron similar to this one which allowed me to create first-class solder joints. However after purchasing a Hakko FX888D earlier this year it was obvious how much faster it reached the correct temperature and held to it effectively, making me wish I’d upgraded years ago.
I also purchased two more items I’d strongly recommend if you want to get serious.
The first was a solder pot. Wires need to be tinned before they can be soldered to something, and a soldering iron set to a very high temperature is sufficient for this task. However litz wire containing individually enamelled strands can be difficult to tin effectively with a soldering iron (or even impossible if the litz wire is extremely thick) which is where a solder pot can help.
By dipping the ends of litz wire into a ‘bath’ of molten solder they can be tinned evenly & effectively, potentially leading to more effective solder joints and correspondingly better cable performance. I bought a bar of solder to fill mine (which only has to be done once) and strongly recommend using a solder pot if you’re working with heavy gauge litz wire. I also suggest purchasing solder flux for coating litz wire before dipping into the pot, which helps tin it more effectively.
My second purchase was a cordless hot glue gun. Heatshink alone will protect your solder joints from damage due to cable wear & tear, but even better durability is achieved by applying hot glue to the joint, trimming the excess with a knife and then adding heatshrink on top. Not a strictly necessary step, but worth it for extra peace of mind. I also recommend using 3:1 rather than 2:1 heatshink which will tighten around your connections even more.
A benchtop vice is useful for fixing plugs in place while you solder wires and then braid them, but I find a stack of old CD cases and some Blu Tack on top does the job. Wire strippers are handy, but some of the wires you’ll be working with are so thin you’ll need to strip the insulation with a hobby knife instead.
IEM Cable Hardware

4.4mm plugs do affect cable performance, so I recommend using Pentaconn OFC plugs for expensive cables when you’re spending a few hundred or more on wire. For cheaper cables I’ve had good results using CEMA rhodium plated plugs.
Satin Audio 2pin connectors are the best-sounding I’ve found so far, but use a locking mechanism that doesn’t work terribly well so I add clear heatshrink over the top to fix the barrels in place.
I recommend purchasing bulk wire from Hakugei, but there are many alternatives on Aliexpress if you’re after something cheaper. For premium solder I’ve had great results using Oyaide SS-47 and have seen Mundorf Supreme recommended often.
Introduction
Cable 1 & 2 – EA Ares S 4 Wire & 8 Wire
Cable 3 – Effect Audio Cadmus 8 Wire
Cable 4 – Effect Audio Code 23
Cable 5 – ISN S8
Cable 6 – Liquid Links Martini
Cable 7 – Liquid Links Venom
Cable 8 – NiceHCK BlackSoul
Cable 9 – Penon CS819
Cable 10 – Penon Leo Plus
Cable 11 – Penon Obsidian
Cable 12 – Penon Vocal
Cable 13 – DIY Cardas Clear
Cable 14 – DIY Hakugei Gray Dragon
Cable 15 – DIY Hakugei Sky-Sea Voice
Talking Point – Cable Performance vs Ergonomics
Talking Point – Cable Value
Talking Point – Cable DIY
Cable Awards
Conclusion
Cable Manufacturer Links & Acknowledgements
Comments